Before you carry on, would you like Learn Photoshop the correct way?
In this tutorial we are going to be looking at Virtual Weight Loss. We’ll be using a variety of tools in this Photoshop tutorial, but the main tool we’ll be using is the “Liquify Tool” and we’ll also be covering the “Healing Brush Tools”, “Patch Tool” and the “Clone Stamp Tool”.

The first thing we’ll be covering is the “Liquify Tool”, so you’ll need to head to the top and Select > Filter > Liquify. You’ll now notice the “Liquify Dialog Box” and another box on the right handside. The first thing you need to select is “Forward Warp Tool” then go over to the right handside and select your “Brush Settings”.
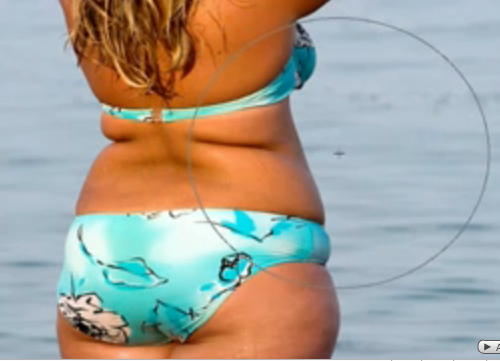
The two things we’ll be focusing on, will be “Brush Size” and “Brush Pressure”. Now you need to zoom in on the backside of this image. See image below.

Now we are going to bring in her sides. So very simply just hold your mouse button down then click and drag. Do the same on the left handside. See image below.

I also mentioned the “Brush Pressure” option before, it works like this. The higher the setting the more of a sharper result you’ll get.
The settings that were used in this tutorial are: “Brush Pressure – 90”.
The next thing you need to do is work your way up and down her body and pull in the areas you think need pulling in. What we are looking for her is a base result, something to start working with.
After you have finished that you’ll need to shrink her bottom. To do this you’ll need to use the “Pucker Tool”, this can be found on the left handside. You’ll need a big brush for this. Now just click a few times on the middle of her bottom, which will make her bottom shrink, again use your “Forward Warp Tool” just to move her thighs in a little bit. See image below.

Like I said this is just a base result. Make sure you save your results. Now zoom in on the back once again and we are going to take care of the roll, as you can see this adds a lot of bulk to her body.
For this you are going to need the “Patch Tool”. All you need to do now is make a selection around the area you are wanting to get rid of, to do this just click and drag your mouse around the roll. See image below.

Now just click and drag to a smooth area you want to replace it with and then let go. You’ll notice it will sample the area you dragged on top of and replaced it with the selection, this effect makes it look really natural. See image below.

Next we’ll be focusing on the “Clone Stamp Tool”. For this you’ll need to get the correct brush size. For this to work you need to “Hold Down Alt or Option” to sample an area. What we are looking for here is a smooth area, then click and brush, that’s it.
As you can see in the image below the roll has nearly gone. I’ve spent seconds doing this and as you can see it’s looking pretty good so far, make sure you spend more time altering the finer details.

Next we are going to go back into the “Liquify Tool” and make some very minor adjustments by bringing her body in. We are looking at the small changes here. These are the ones which make the biggest differences to your images.
Check the before and after images below for the finished result.

Source : MrVemzer


